

如果您正在製作一個屬於自己的部落格,每天都會有成千上萬的文章產出,想要讓Google搜尋到自己的文章可能會花費非常久的時間,為了讓大家盡快在Google中更快搜尋到自己的部落格文章,這時候就需要使用Google Search Console來助自己一臂之力。
初學者在進行第一個步驟時就會在 Google Search Console驗證 中卡關,就讓Moreony來為您解答吧!
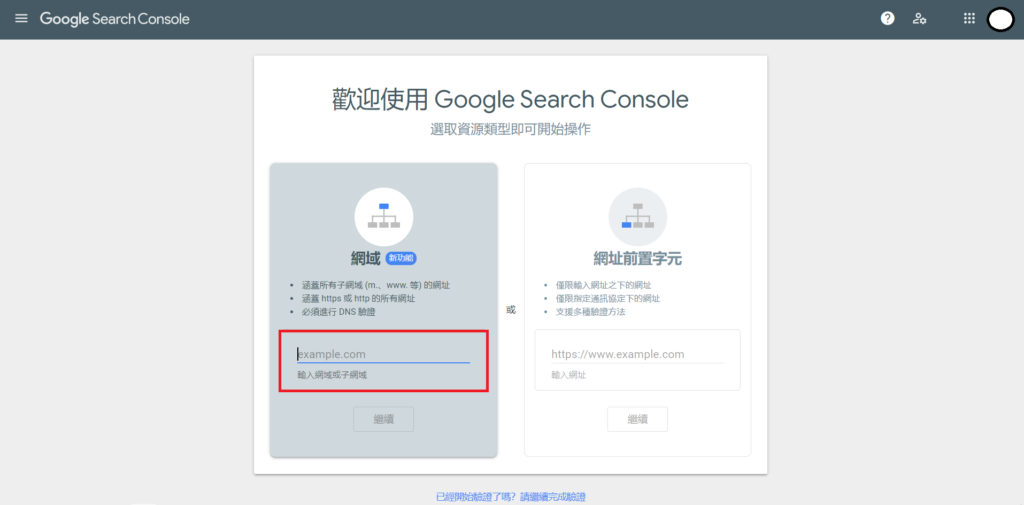
1. 首先Google搜尋Google Search Console,進入該首頁
在左邊網域輸入自己網站的網址。
2. 輸入網域名稱後會出現五種驗證的方法
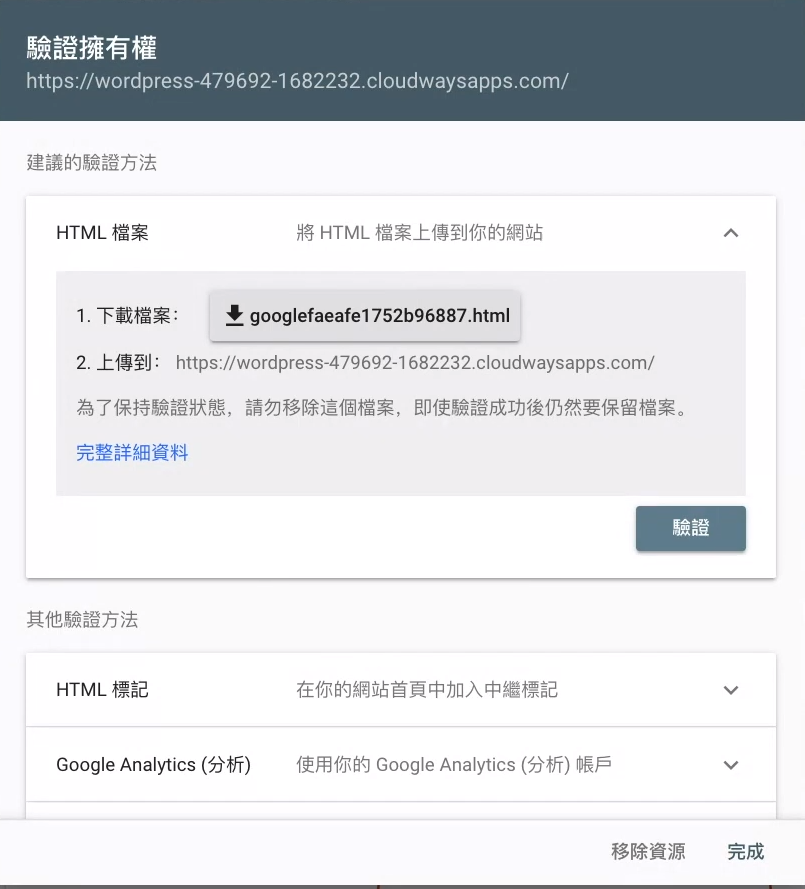
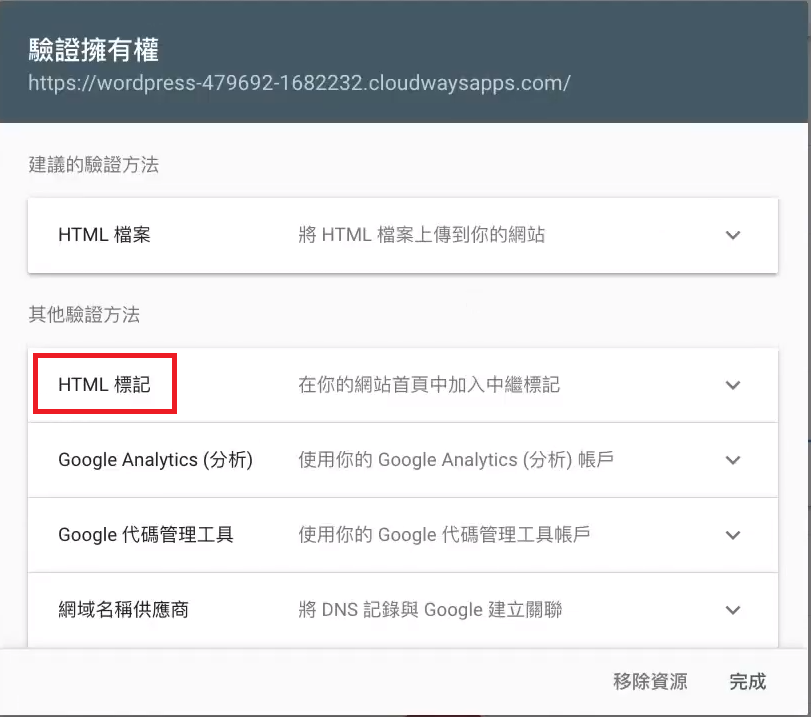
3. 選取第二種方法
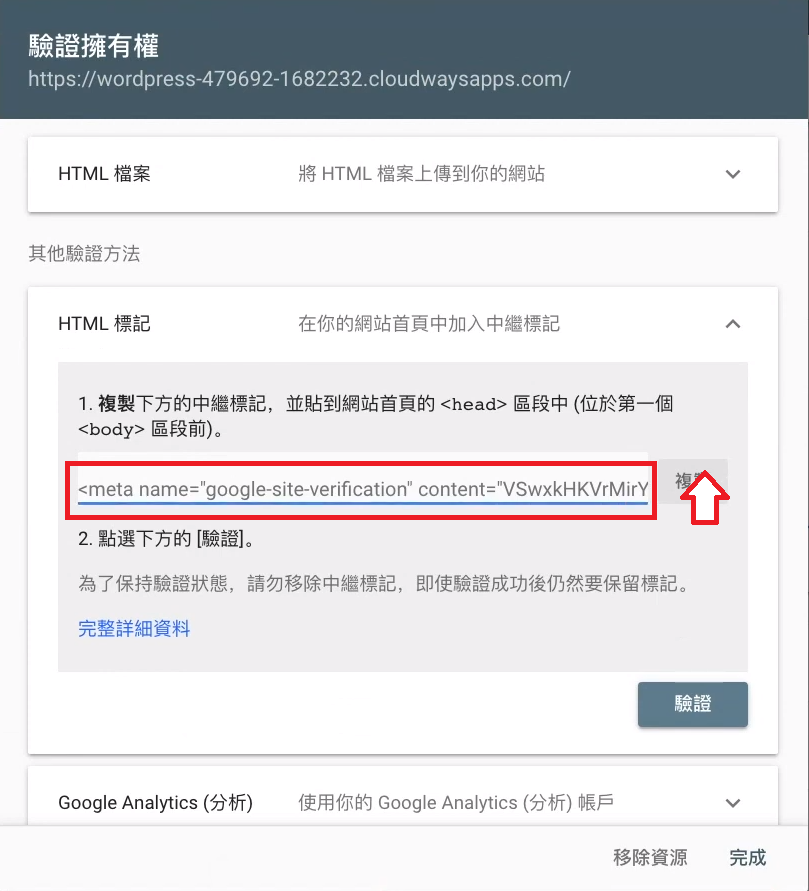
4. 複製HTML代碼
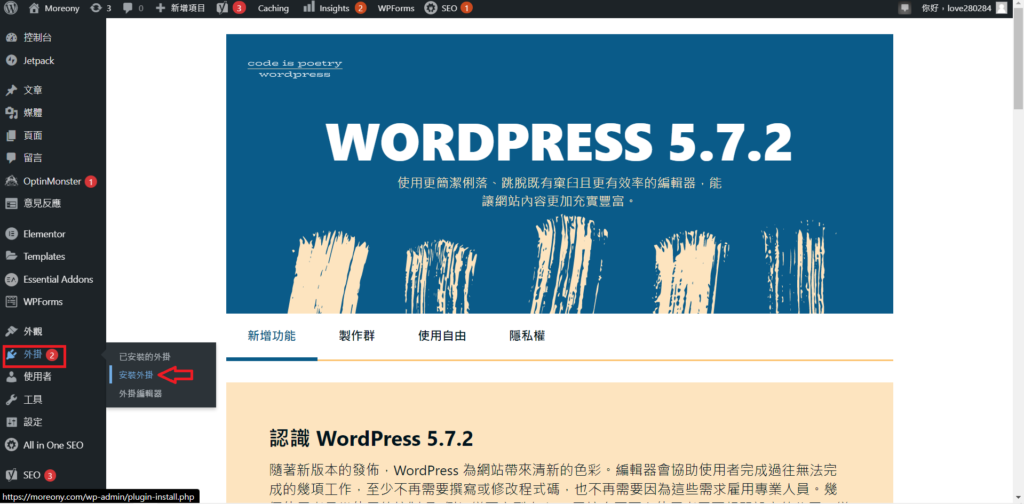
5. 回到WordPress前往選單裡的外掛中的安裝外掛
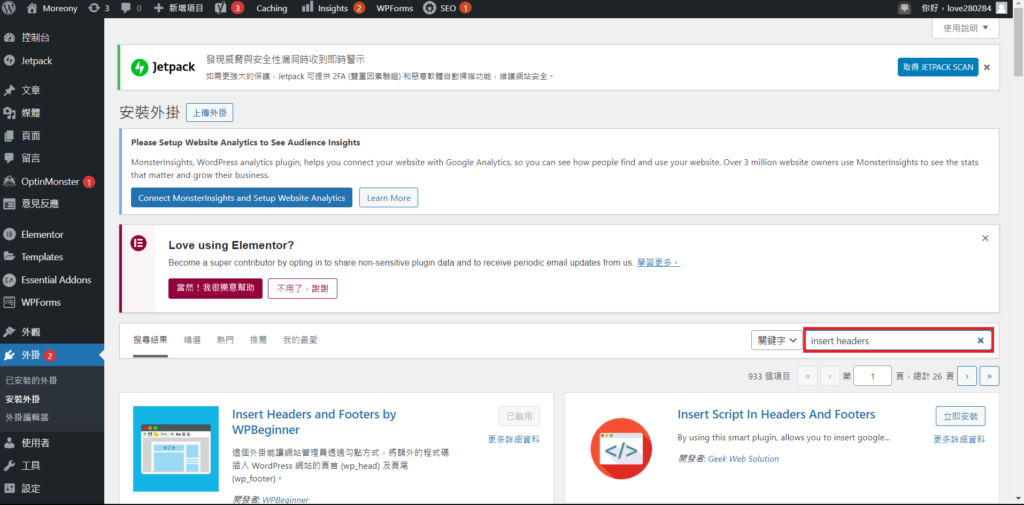
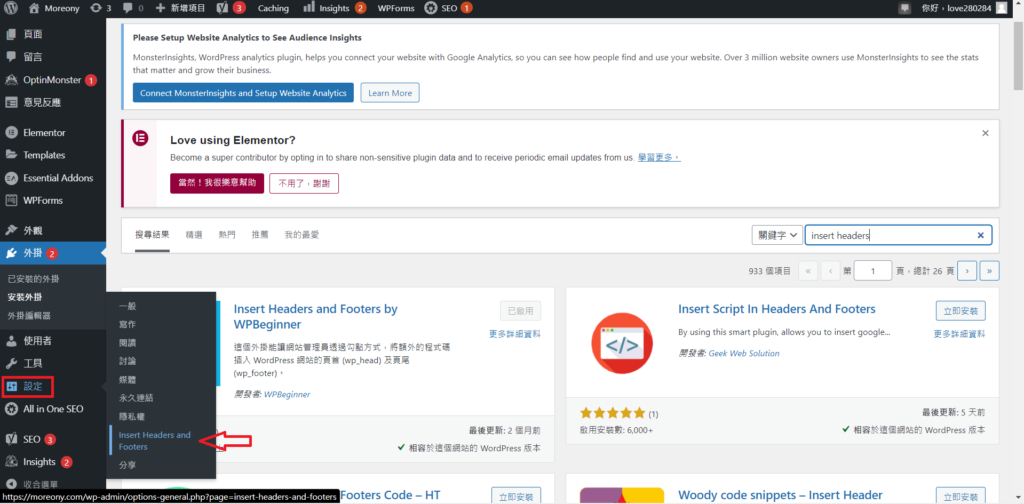
6. 在搜尋框裡搜尋 insert headers
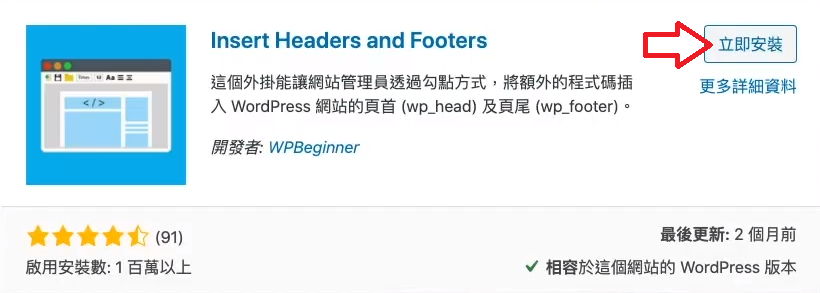
7. 搜尋到Insert Headers and Footers,點選立即安裝
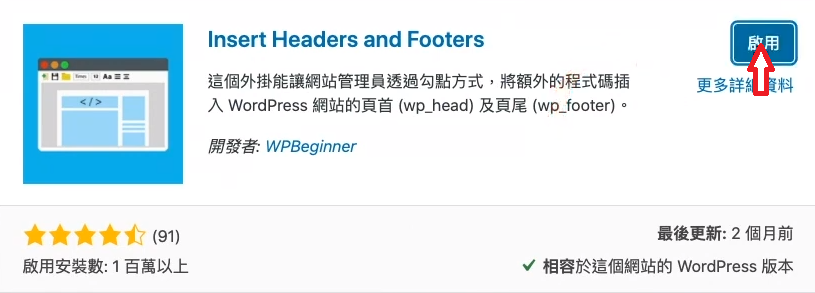
8. 啟用Insert Headers and Footers
9. 在WordPress 選單中選取設定裡的 Insert Headers and Footers
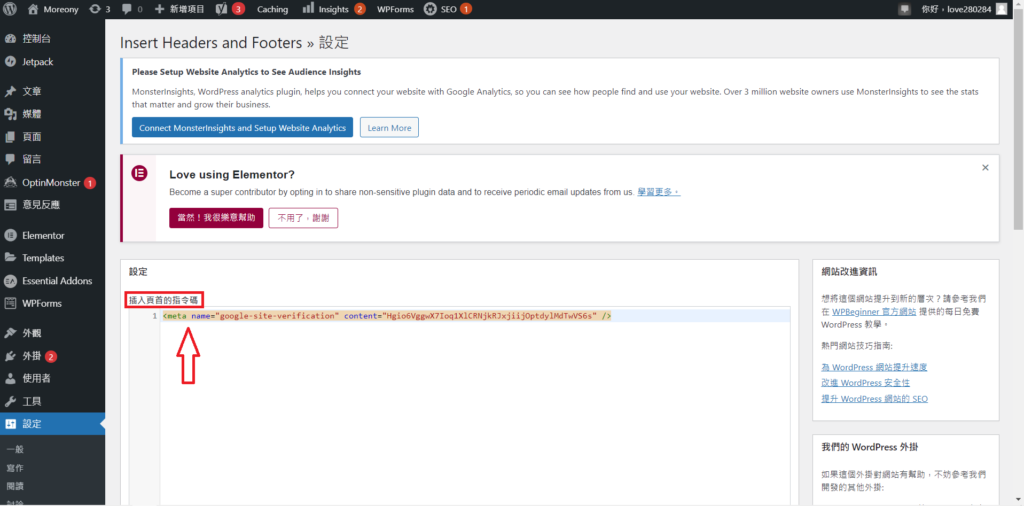
10. 將剛剛複製的HTML代碼貼上至<插入頁首的指令碼>欄位中
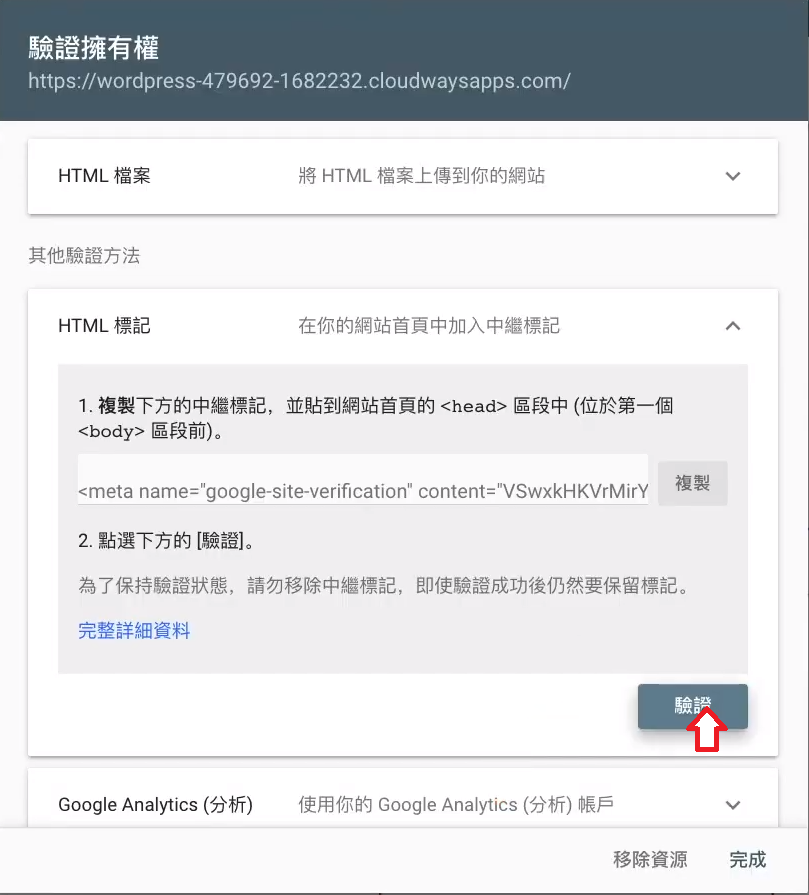
11. 回到 Google Search Console驗證 點選驗證
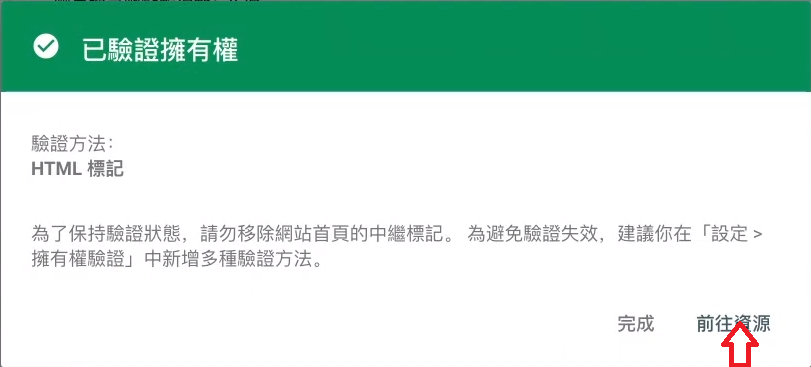
12. 恭喜!Google Search Console驗證 成功!!
13. 現在就可以在左上角看到自己網頁及名稱囉!

以上是 Google search console驗證 的步驟,希望這些內容有幫助到你唷~
如果喜歡的話希望別吝嗇給我們一些鼓勵,因為您的支持就是我們的最大動力!!